Brand new rules documentation

Have I mentioned how important I think it is for a linter to have great docs? Well, now is the time for Curlylint to live up to this!
New documentation format for rules#
Up until now the rules’ documentation was pretty sad, essentially limited to what could fit in the project’s README. Now… take a look:
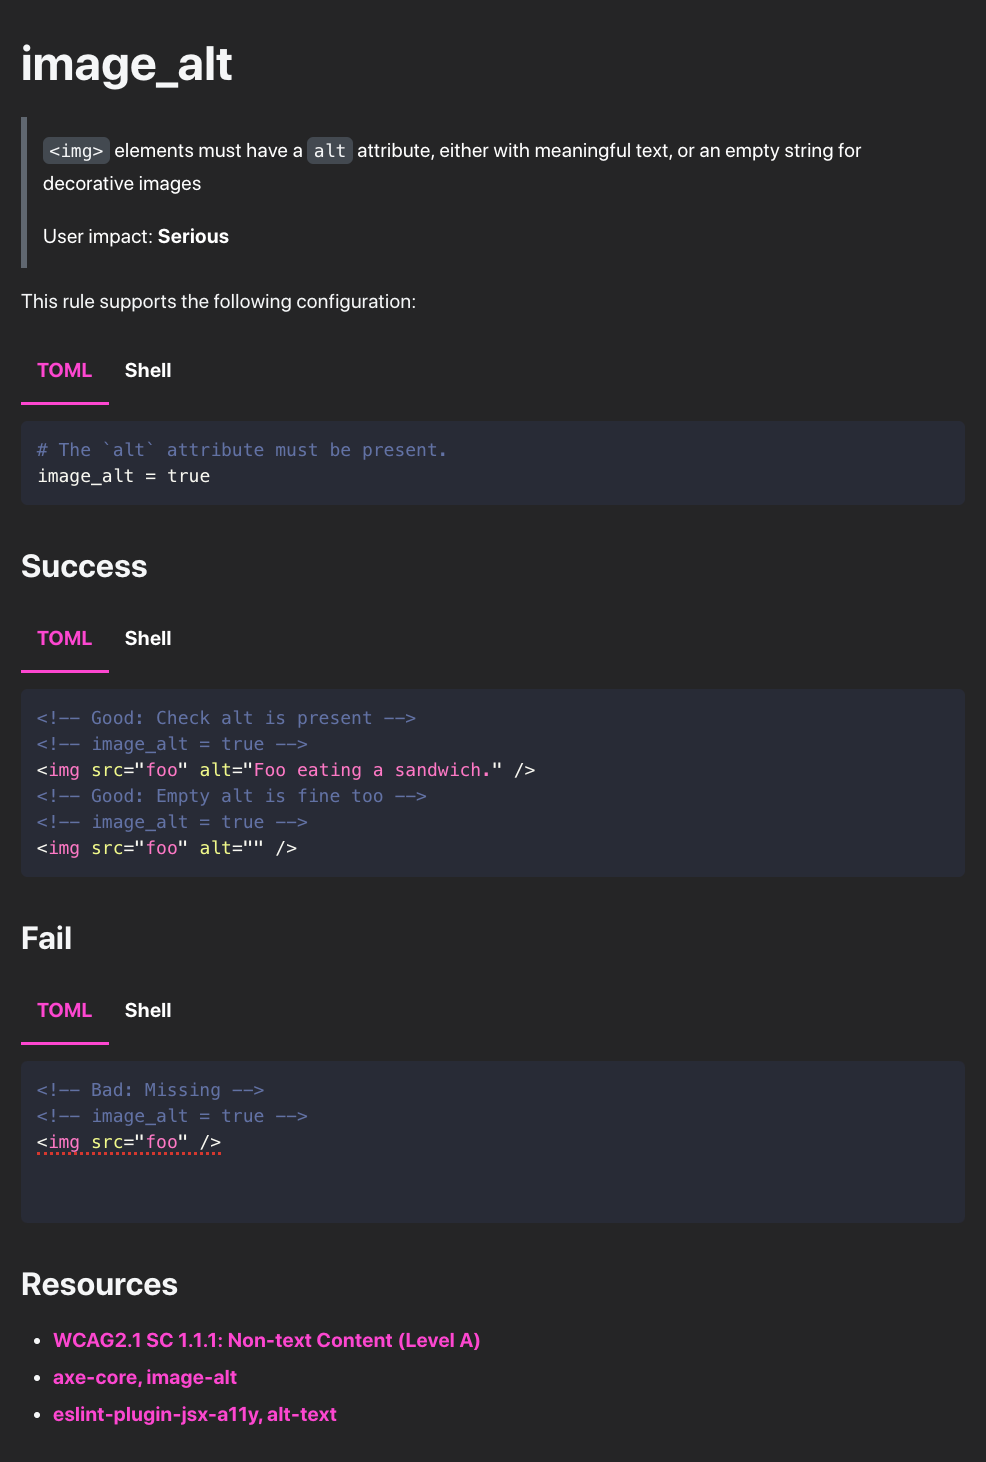
- The rule’s different configuration options are clearly visible, copy-pasteable, each with a description.
- Cases where the rule check "succeeds" are well documented, alongside a comment, and matching configuration.
- Same for problematic cases, which even show the actual error message!
- All of this is toggle-able between the different configuration formats supported by Curlylint!
- There are follow-up resources available for developers who want more information about the rule.
This feels like a pretty big step up compared to the previous documentation, and should hopefully make it as easy as possible for people to start using the linter for their templates.
How this works#
The majority of the rules’ documentation is generated from their metadata:
JSON Schema#
The configuration options are all defined with JSON Schema.Currently this is only used to generate the documentation, but in the future I would also like to make this validate configurations as Curlylint runs.
JSON Schema is particularly good for this because it has built-in support for the schema to be self-documenting – adding titles, descriptions, and examples, which are all used to generate the documentation. Here is the schema of the html_has_lang rule as an example:
Test cases#
The success / fail sections are simply coming from the project’s test suite! I always prefer to invest time writing extensive unit tests for projects of this kind. Some of the test cases simply have a flag marking them as "documentation examples":
It’s the same story for “fail” cases, where the annotations are simply generated from the expected output (issues):
MDX#
All of this comes together with MDX, a Markdown-inspired syntax which makes it possible to use JSX directly inside documents, thereby making it possible to use React components, like the language tabs and code snippets with annotations:
Docusaurus supports MDX out of the box, and provides the "Tabs" components. The CodeSnippet component is originally from Docusaurus but has been customized to support basic annotations.